Monday, March 29, 2010

Williams Sonoma Vanilla Cake review

Sorry about the silence! I have been extremely busy with shelf exams, rotations, and of course trying to get in some much needed R & R. So my apologies to my 4 faithful readers - I definitely dont want to lose you! :) It was my roommate's birthday recently and my other roommate and I decided to make her a vanilla strawberry cake. Being low on time, we figured a box mix would be easier. In actuality, we should have just gone out and bought a ready made cake; this cake took almost 4 hours to make. We also didnt have time to make the frosting either so we just used Betty Crocker Dark Chocolate frosting.


Ingredients:

1 box mix of Williams Sonoma vanilla cake mix (this also requires egg, butter, milk...and i cant remember what else. Sorry, you'll have to check the box).
1 pint heavy whipping cream
6 tablespoons sugar
4 pints strawberries
1 tub of premade frosting (we used betty crocker dark chocolate)
powdered sugar/confectioner's sugar for decorating

Method:
1. Assemble the ingredients.


2. Wash the strawberries. Dont they look beautiful? Yes, it warranted a picture. :)


3. Cut the strawberries into 1/8 inch thick slices (reserve 5-6 whole strawberries to decorate the top of the cake at the end). Add 2 tablespoons of sugar to the cut strawberries and place in the refridgerator for them to chill and soak.


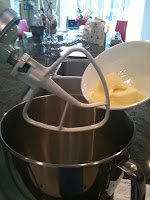
4. Start making the cake mix according to the instructions on the box. Here are some pics of the action.


5. Decide the cake batter into 3 round 8" tins.


6. In a separate bowl, add the whipping cream and 4 tablespoons of sugar. Beat on high until the cream stiffens. Then place in the refrigerator until the cakes are completely cooled.


7. When the cakes are completely cooled, with a serrated knife divide them into two layers. Add a layer of whipped cream, and then strawberries, and then another layer of whipped cream and then stack the divided layers together. Repeat until you are satisfied with the amount of layers your cake has.


8. When you are done stacking the cakes, with a serrated knife, trim around the edges so that all cake layers are of uniform size and shape. Now's your opportunity to snack on those cake scraps!


9. With an offset metal spatula, apply a thin layer of frosting to the entire cake (a "crumb coat") which will catch any of the crumbs before you apply another coat which will make the frosting smooth.


10. Using a strainer, put some powdered sugar into the strainer and shake it lightly over the cake to decorate the top.
11. Place some of the sliced and whole strawberries on the top and enjoy! Here's the final product after we dug into it.
So, what's my take on the Williams Sonoma Vanilla cake mix? Well, it was definitely better than any supermarket brand cake mix (i.e. Betty Crocker, Pillsbury, etc). It was moist, had a wonderful vanilla aroma, and tasty but I still think homemade is the best. Was it worth the $9.99 for the cake mix? (I got it on sale, regular price is $14.99). Hmm, not sure. My roommates loved the cake, they felt it was tasty. The consistency of the cake was extremely easy to work with in terms of stacking the cake and decorating it, which was nice. I feel like the supermarket brand cake mixes are a little more crumbly. Would I buy the cake mix again? Probably not, but I am glad that I tried it. That said, I still heart williams sonoma food! Its a staple in my cupboard. Oh, and the dark chocolate Betty Crocker frosting? Not a fan. Homemade frosting is way better too. Thanks for reading!

Wednesday, March 10, 2010

Creamy Sun Dried Tomato Basil Pasta

Sorry for not posting anything lately. This past weekend I was at my parents' house and they loaded me up on food for the week; hence, no need to cook. But unfortunately, I finished off all my goodies yesterday so today I'm back to being independent.


Ingredients
1 package of fusilli or penne pasta (8 oz)
1 cup of heavy cream
1/4 cup of sun dried tomatos packed in oil, lightly drained
1 tablespoon oil or vegetable oil
4 cloves of garlic, minced
1/8 cup of fresh basil
3-4 teaspoons of salt
1.5 tablespoons of pine nuts
freshly cracked black pepper


Method
1. Assemble all ingredients


2. In a medium sized pot, add water and begin boiling your pasta. Cook until al dente (about 15 minutes).
3. In a medium sized skillet, add the olive or vegetable oil and minced garlic. Saute over low heat for about 2-3 minutes.


4. Add the heavy cream and the sun dried tomatos. Continue to stir over low heat, until the sauce thickens. Add the salt (season to your liking).


5. Add the basil and continue to stir on low heat. The sauce should be fairly thick by now.


6. Add the cooked pasta to the skillet and stir until the pasta is fully coated with the sauce.
7. Top the pasta with pine nuts and freshly cracked pepper. That's it!

Tuesday, March 2, 2010

Thai Chicken Wraps

Chicken - its whats for dinner! I really like this recipe because its quick and tasty. I know that this is supposed to be a baking blog, but a girl's gotta eat too right?! That, and I need something to pack for lunch tomorrow because hospital cafeteria food is so gosh darn unhealthy.


Ingredients


8 flour tortillas (8 inches)
2 lbs skinless, boneless chicken thighs or breasts
3 tsp garlic salt
3 tsp freshly cracked black pepper
1 tablespoon cooking oil
1 package of vegetable stir fry mix (serves 4)
2 minced garlic cloves
5 tablespoons crushed peanuts
1 tablespoon cilantro

Peanut sauce
1/4 cup + 3 tablespoon granulated sugar
1/4 cup creamy peanut butter
2.5 tablespoons soy sauce
3 tablespoons water
1.5 tablespoons vegetable oil
3 minced garlic cloves

Method

1. Assemble the ingredients.


2. Wash the chicken and cut it into strips about 1/2" thick by 1" long. Add the garlic salt and pepper and toss until thoroughly mixed. In a large skillet, put 1 tablespoon vegetable oil in and began frying the chicken on low heat until fully cooked.


3. Wash the packaged vegetable stir fry. Add the 2 minced garlic cloves to the vegetable stir fry and cook on low heat, stirring frequently under the vegetables are tender.


4. In a small sauce pan, combine the ingredients for the peanut sauce and cook on low heat, stirring constantly until completely mixed.


5. Now assemble everything. Spoon some peanut sauce onto the tortilla and add the vegetables and chicken. Top with crushed peanuts and cilantro and enjoy! :)

Monday, March 1, 2010

Lemon Sugar Cookies

Mark your calendars - March 6 is National Dentist Day! In honor of this holiday, I wanted to recognize my sissy and her awesome office staff. I really enjoy making decorated sugar cookies so I went on Amazon and found a toothbrush and tooth shaped cookie cutter. This became my post call activity so please excuse the shoddy decorating job. Also, I know that I'm a little premature in whipping these up almost a week early, but being a student still, you kinda have to do things around student schedule. Mondays are the new Fridays when you're a med student. Heck, any night that you're not on call is the new Friday. Let's get started!

Ingredients
1/2 cup butter (softened)
2.5 cup flour
1 cup granulated sugar
2 eggs
1/2 tsp baking powder
1/2 tsp nutmeg
1/2 tsp salt
2 tsp lemon juice
1 tsp vanilla
1 tablespoon heavy cream
1 tablespoon grated lemon zest

For the icing:
1/4 cup meringue powder (can get this from Michael's craft stores)
1 lb powdered sugar/confectioner sugar
1/2 cup boiling water
food coloring

Method
1. Assemble all ingredients. I even splurged on Williams-Sonoma vanilla extract...it smelled delicious but I'm not really sure if it enhanced the taste of my cookies. I also feel compelled to do a quick plug about how awesome Kitchen Aid stand mixers are. It is the work horse in my kitchen!


2. Cream together the butter and granulated sugar. Add the eggs and beat well.


3. In another bowl, mix together the nutmeg, salt, baking powder. Sift or if you're too lazy, stir in the flour.


4. slowly add the dry mixture to the creamed butter and sugar mixture. Mix well and with the mixer still on, add in the heavy cream, vanilla, lemon juice, and lemon zest.


5. Pound out the dough and wrap in wax paper. Refrigerate for at least 1 hour.


6. After you feel like the dough is pliable, roll out the dough on a well floured surface to about 1/4" to 1/2" thick, depending on how thick you like your cookies.


7. Bake at 325 degrees for 14-15 minutes or until lightly browned.

During this time, start making the icing by mixing boiling water with granulated sugar until fully dissolved. Add the meringue powder and whip until slightly stiff peaks form. Add the powdered sugar and beat until stiff. The icing will harden on room air so if you want to save it, you must put it in a metal container (not plastic). To decorate the cookies, thin the icing with water until it is at a consistency that is neither too runny nor too hard and add food coloring until it is the shade you want. Put the icing in a parchment pastry bag and start piping!